Fabric Silhouettes
Materials:
~2 Fat Quarters of different prints (I used Prelude by Jennifer Paganelli of Sis Boom)
~Fusible Webbing Paper Backed
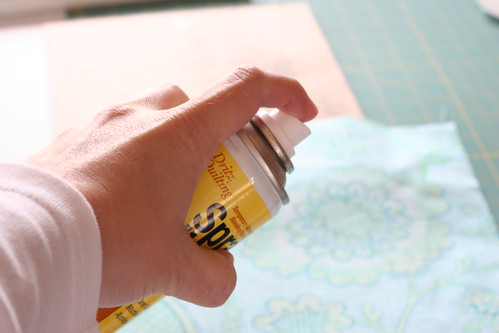
~Spray On Adhesive for quilting (It can be found in your quilting section and only temporarily bonds.)
~Printer
~Picture Frame
~Marker or Pencil
There is one important thing to remember: your image will be mirrored when finished. That means that you need to have the image flipped from the way that you will want it in the end. You can select this as an option when printing.
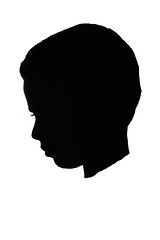
This is the image that I started with:

This is the image that I actually printed after editing it:
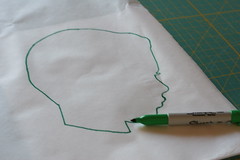
Now, we are ready to add the image to the fusible webbing. I keep a roll of this at home and couldn’t even tell you the brand name. I’ve had it that long. They are all pretty much the same. It will have a paper backing on one side and on the other will be a round side. Place that side down and leave the paper side up. Slip your printed image under the paper. Then, take a pencil or marker and trace around the image onto the paper side of the fusible webbing. You should have something that resembles the image below.
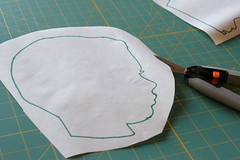
Your next step is to cut widely around the image. Do not cut it along your lines yet. We are going to fuse this piece to the fabric first.
Once you have something that looks like the above image, take it and the fabric you wish to use to the iron. Follow the manufacturers instructions for fusing this to fabric. Let this cool down. Your image should now be adhered to your fabric.

Once the fabric is cool to the touch, you may cut your image out along your drawn lines.

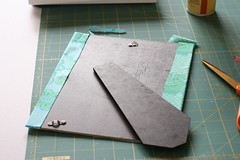
Set this aside. You will now take your other fat quarter and the backing of your frame. Lay the fabric over the backing of your frame to get an idea of the size that you need to cut the fabric. I cut mine a little larger than the backing.

Once this is cut to the size that you would like, take this piece of fabric and your silhouette to the iron again. Peel off the paper back on the silhouette and place it on the piece of fabric where you would like it to fall. Then, according to the manufacturer’s of the webbing instructions, adhere it to the larger piece of fabric.

Take this new piece back to where you have your frame backing. Turn it over. Spray the adhesive to the back side of the fabric making sure you reach all sides. Turn this piece over and place it on the frame backing. Press down all around your fabric. Then, turn the frame back over and press the sides down or trim them to the size of the backing…this is your choice.
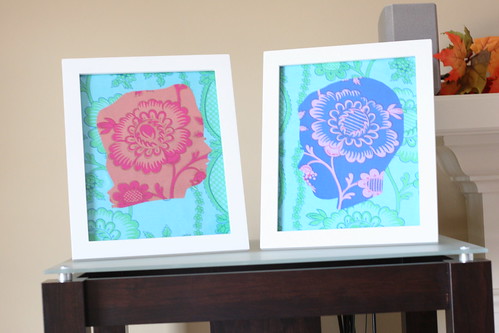
Place the backing back in the frame and you are done.
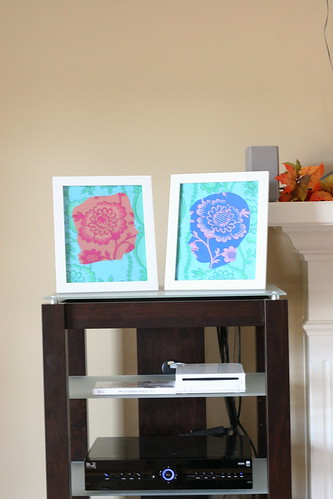
This would be a great project for all types of fabric and images. Have fun with it!


5 comments:
Thanks for posting this!
This is AWESOME!!!!! You just solved my "what to get family for Christmas" problem.
THANKS!
I was thinking of using these for the same purpose! I thought it fits everyone and you can customize them in prints to match their likings.
Thanks!
Nice idea - good tute! Thanks for sharing, Alison x
Thanks for the tutorial. This is just the thing I need to decorate my bedroom.
-Andre'a
Post a Comment